In this article, I will introduce the way to create and edit a page with brizy builder plugin with step by step.
Let’s start!
Step 0: Install and active brizy page buider plugin
Before using brizy or any other plugin, you have to install and active it.
- Login your WordPress with admin role.
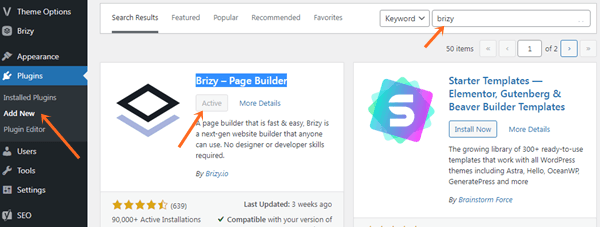
- Come to the dashboard, and navigate to “Plugin” – click on “Add New”.
- Type “brizy” on search box to find “Brizy – Page Builder”.
- Click on “Install” and wait a moment, click on “Active” button to active the plugin.
That’s done to install the free plugin of Brizy Page Builder!
If you want to active the Brizy Pro Plugin, you need to do more steps (with photos below):
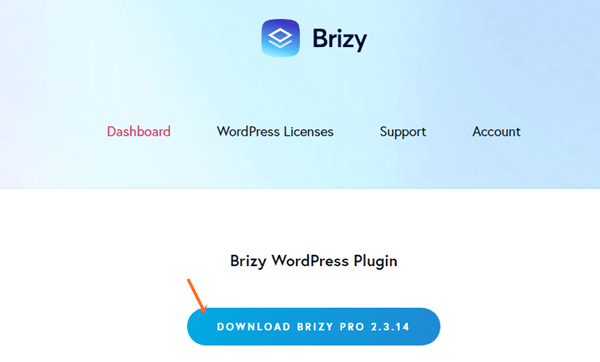
- Come to brizy.io and login it with your account.
- You will see on the dashboard “Download Brizy Pro”, click on it to download it.
- Come back your WordPress website at dashboard.
- Come to “Plugin” – click on “Add New” – see the top to find and select “Upload Plugin”
- Select on “Choose File” to navigate the location where you save Brizy Pro Plugin, which you have just downloaded.
- Click on “Install Now”, wait a moment, select “Active” to active this plugin.
- Continue coming back the brizy.io and select the tab “WordPress Licenses”
- You see under it with the button “GENERATE A NEW LICENSE”, and click on it. The system will create a licensed code. Click on “full key” to see and copy all characters of this code.
- Come back your WordPress dashboard again, click on “Plugin”, find and click on “Settings” under the Brizy plugin.
- A new page opens. Select on the “license” tab.
- Enter the Brizy Pro Licensed Code that you have just copied. And, select “Active”!
That’s finished to active pro features of the plugin Brizy Page Builder! So, you can use all advanced features of this great page-builder plugin.
If you want to see the guides in photos, please see below:
Generate a licensed code of Pro Brizy.

Go to settings of Brizy.

Enter the code to activate the pro features.

Now start to create a new page with this plugin!
Step 1: Create a page to start working with brizy plugin
You need to have a page to start working with brizy page builder. It means with this step, yo create a page on WordPress as normal.
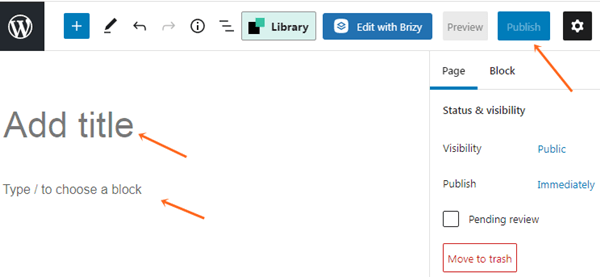
- On the dashboard, open Page > New page.
- Type title and click Publish.
Step 2: Edit the page with Brizy page builder
Click on “Edit with Brizy” to open the page to edit it
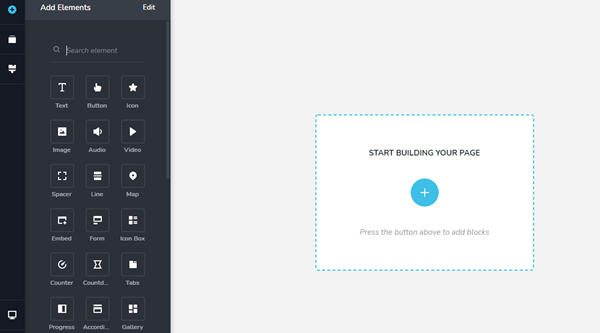
Click on + (cross) and a pop-up of brizy blocks will display.
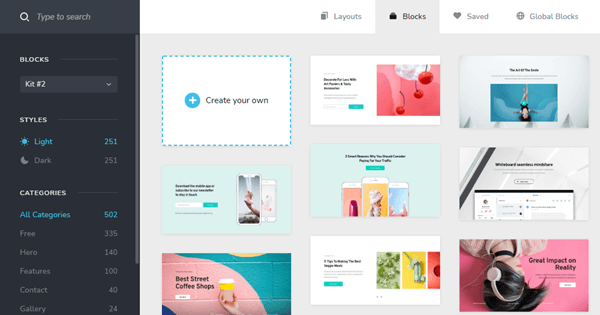
- Blocks: You can see the Blocks tap, which contains plenty of available made blocks for your design.
- Layouts: Where you can find many already-made templates.
- Categories: Which is on the left under the black color. When you click on it, you can see many groups of blocks and templates following the topics.
Choose any block or template, and double click on it. The block or template will auto download and display on the page.
To edit any element in the block or template you have just install, you click on it.
Firstly, edit the photo. Click on the photo, a small black box is displayed under it with many features:

- Change the photo
- Change the background color of the photo, and hover feature of its color
- Link the photo to another url
- Align the photo: left, right, center
- More settings about css, including padding, height, width of th ephoto
- Copy the photo by double it
- Delete the photo
Now, you click on the letter part to edit the words.

- You choose to edit letter, including font, size, font size,…
- Change the color of letters
- The others are for align, font style, link, setting for padding, copy, and delete.
After you edit, please remember publish the page for the fist time, or update for the next ones.
Step 3: Create footer and header for a page
Start to scroll down the page, you will see the cross (+) to add a new block for your header or footer.
#1: Click on it! You will come to the block.
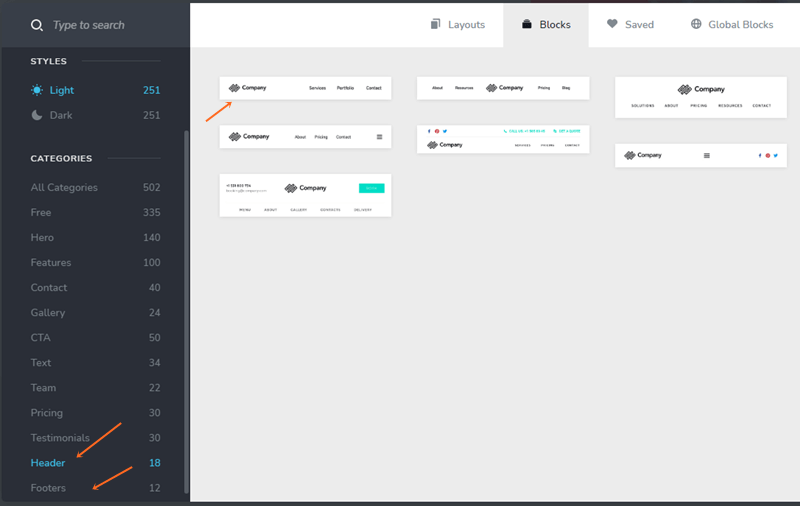
#2: On the right side menu, you can see header or footer.Select one of them to work with it!
Start with header! Then, choose the style of header block that you want to display on your website.

#3: Then, you click on “Company” to change it with your logo.
Come to “Select a menu from the element options” to add a menu for the header.
Please note that you have to create a menu in advance at Dashboard WordPress – Appearance – Menu.
>>> Learn how to create a WordPress Website.
And, please note to choose the arrow at the corner and then the hamburger icon to select menu. See the photo below, please!

#4: Now, the header is under the page. You have to move it at the top of this page.
On the right bar, click on the icon of Reorder the bock. Then, move the header to the top.
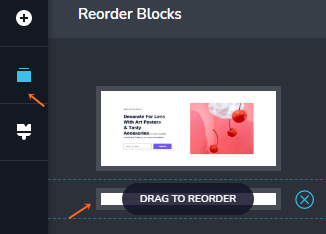
#5: You can come back the step to create the footer.
Remember to update what you do!
Step 4: Change the title and description for the brizy page
This step is worked out of the brizy. It is necessary to change the title and description of the page to make them suitable for SEO skills.
#1: To do this, you have to install Yoast Plugin in advance.
#2: Choose the Edit page as normal, not Edit page with brizy.
#3: Find Yoast SEO at the bottom of the page. For some themes and updates, Yoast SEO can stay at right side bar.
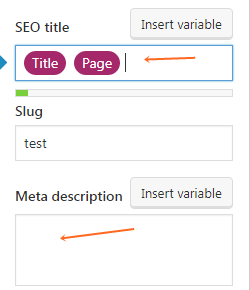
Add title and description as you want. Remember update to save your work! Done!
You can have a complete page to build with brizy page builder.
If you have any question, please tell me!





Leave a Comment
Log in to post a comment.